Hey! If you're reading this, you might be a fellow gamedev wondering what I did to make this project possible. It's great to meet you!
This article is a detailed breakdown of the tools, systems, characters, and effects I did for ToBI over a year of development — from doodling on notebook paper to presenting the game at DreamHack Atlanta.
I've linked to code samples and assets throughout, but if you're curious about anything in the game I don't cover here, feel free to contact me.
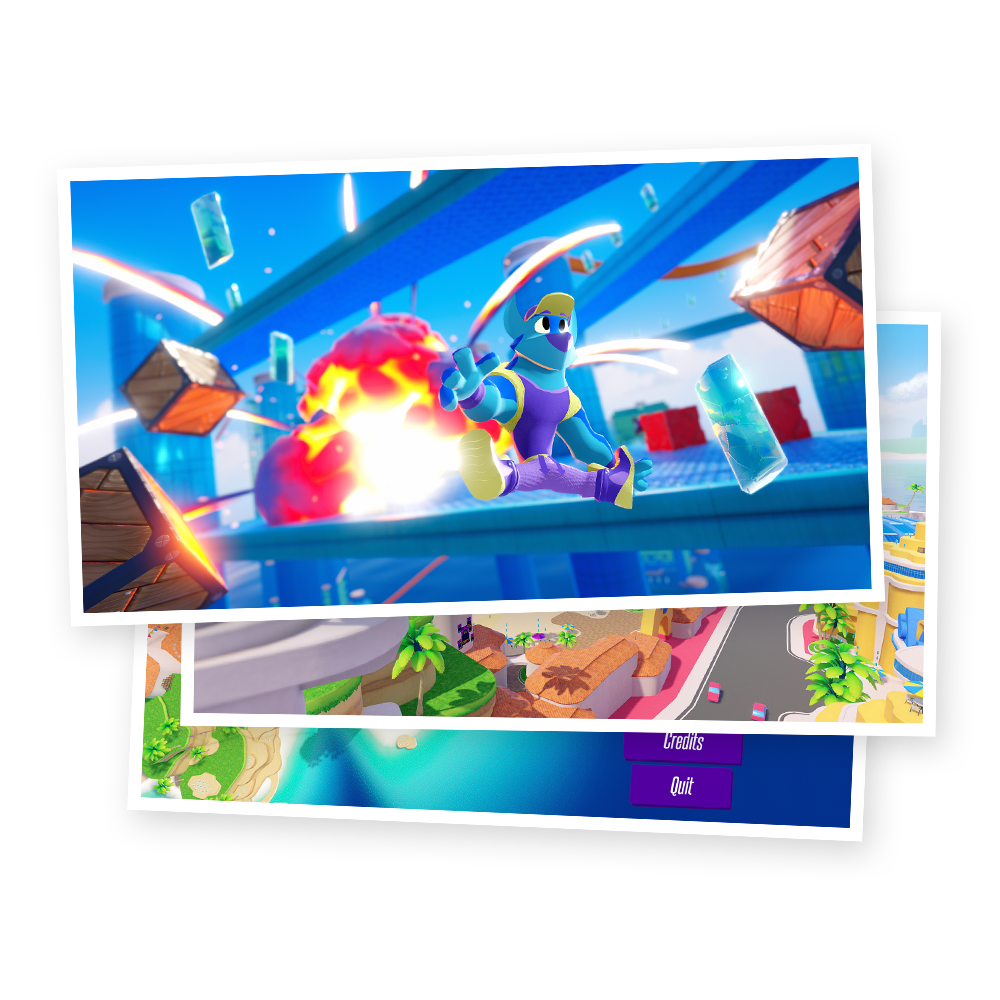
But first, let's watch some gameplay from the final product:
EDITOR TOOLS
I pitched Trouble on Beryl Isle as a streaming, open-world adventure, which is about the highest form of hubris a team of student volunteers might be capable of. But thanks to a set of editor tools and workflows I developed during pre-production (along with a lot of dedication from everyone on the content side of things) we were able to pull off something remarkably close to that original concept.
Procedural Polygons
So — how do you make a game that takes place in a city without a big team of environment artists? From the beginning, it seemed obvious that the scale I was imagining for Beryl Isle would prevent us from modeling everything by hand. Instead, I wanted to develop a tool that would let us build convincingly-artpassed geometry directly inside the Unity editor.
Enter the procedural polygon, the geometry blocking tool that made the game possible. By dragging around some points and applying a style, a simple 2D shape can become anything your heart desires.
Said in a less cutesy tone, this is a procedural mesh generator that was used to make 99% of the game's geometry. Conceptually, it's like the lathe or spin tool in most modeling programs. A polygon "style" is a marked-up edge silhouette that defines any angles or bevels on the polygon, and assigns which materials are used where. The generation algorithm takes that silhouette, extrudes it around the given 2D shape, and optionally closes off the top and bottom for you.
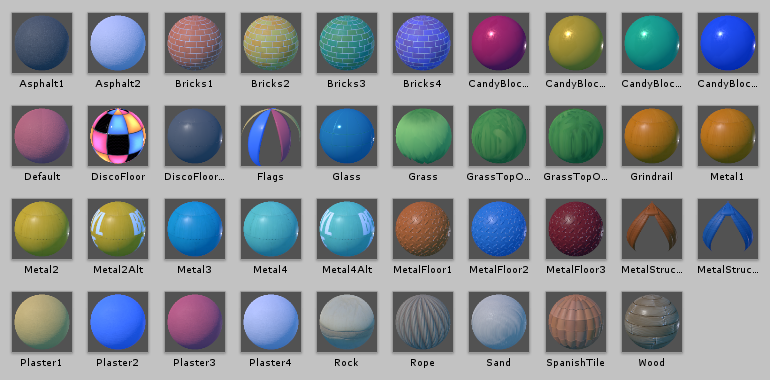
I made 21 polygon styles in total, for various surface needs like grass, Spanish tile, brick, metal siding, and glass. The actual materials and textures used on the styles I created with Substance Designer.
I found out later that this is more or less the same workflow that Insomniac Games used to make the buildings in Spider-Man — a polyline tool that lets you define the core shapes of buildings, and then modularly beautifies them for you with predefined bevels and textures.
You can check out the complete source code for the tool in the ToBI sample repository. One of the other programmers on the team also extended the tool with the ability to mirror and scale shapes.
Open-World Editing
Having a quick way to make buildings is good, but that's only half of the problem. Since Beryl Isle is one large, contiguous playspace, I needed a way to split it up into smaller chunks — both for performance reasons, and to allow the team to build freely without fear of merge conflicts.
The solution was another editor workflow, which takes advantage of Unity's additive scene loading. All of the scenes saved within a specific asset folder are called world areas, each containing a human-intuitive portion of Beryl Isle (usually, a building or group of buildings designed by one person.)
Whenever one of these scenes is saved in the Unity editor, my scripts automatically generate a corresponding world area prefab, with a LOD model of the scene geometry and a loading zone surrounding it. All of these area prefabs are then placed in the Beryl Isle base scene, which houses everything common to the island (lighting, ambience, sky, etc.) As you run around in that base scene, the prefabs check where you are and additively load / unload their corresponding scenes.
This workflow also meshed really well with the procedural polygon tool: since most of the geometry in the game is procedurally generated, these scripts can automatically make accurate scene LODs by running that same code with the settings turned all the way down.
Overall, I'm happy with how this workflow came out — it made everything from large-scale collaboration to small scene fixes very painless throughout development. If I were to iterate on it more, I'd move away from using axis-aligned bounding boxes as loading zones, since they didn't always intuitively capture the extent of an area.
click on prefab → open scene → make changes → save / close scene → prefab updates!
CHARACTERS & ANIMATION
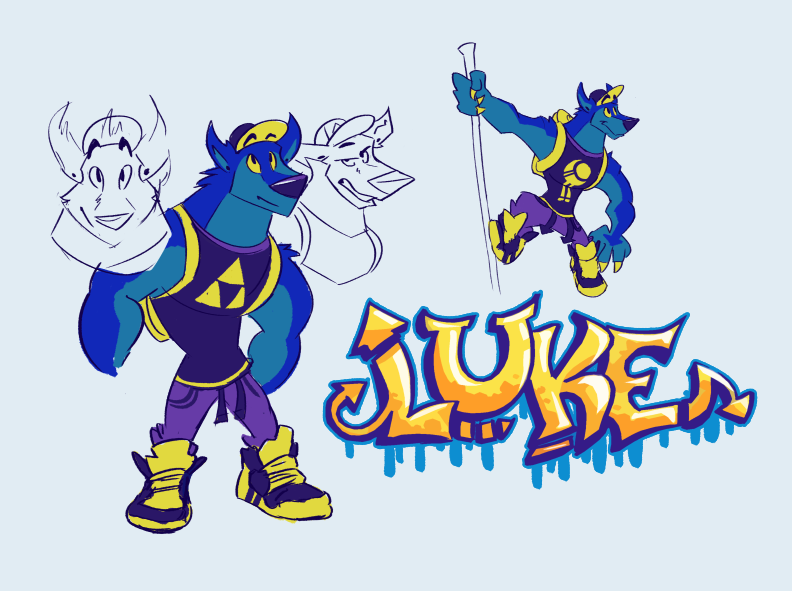
One of my personal goals on ToBI was to create fully hand-animated 3D characters in Unity, which I hadn't done in any of my games before. Since the cornerstone of any 3D platformer is the main character's moveset, a big part of my pre-production effort went into creating Luke the Wolf and figuring out how I wanted him to control.
I also wanted the rest of the team to be able to design their own fun characters and enemies, so I built Luke on top of a custom, generic state machine system that saw a ton of use throughout development.
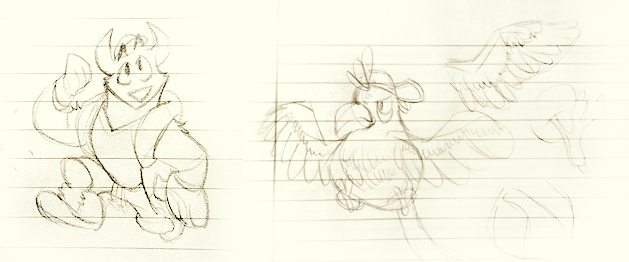
from character doodles to working gameplay
Luke & Boyd
I was solely responsible for two characters — the protagonist, Luke, and a parrot enemy named Boyd who flies around and tries to slap you. I used Blender to model, rig, and animate both of them, and created their textures in Photoshop and Substance Painter.
Between them, they have around 50 animation clips (mostly for all of Luke's moves) adding up to about a minute of hand-keyed animation. Given the tone of the game, I had a great time getting a bit wacky with the squash-and-stretch.
Both characters also have some subtle touches of procedural animation, which helps to make them feel more lively and responsive. Boyd's tail is animated entirely in code as a springy chain of masses.
Luke has an additive "lean blend", which I use to make him quickly face the player's input direction. His pupils are on a render texture, so they can track motion or swirl around when he gets hurt. His ears, cap brim, and drawstrings all use Unity's cloth component to simulate some floppy secondary action.
On top of the hand-animated squash-and-stretch, I also programmed in a procedural way to jiggle Luke's scale — useful for game feel when a collectible flies into him, etc. When his rigidbody collides with the world, the accelerations involved are also routed into the procedural jiggling.
Character System
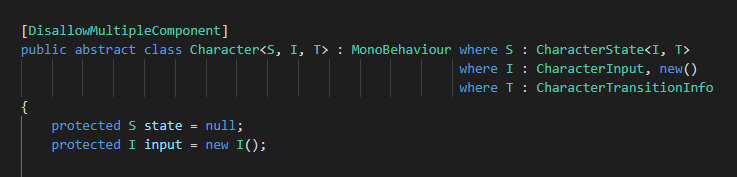
As I mentioned before, all of the characters in ToBI descend from the same generic character system. The goal here was twofold: to have a strongly-typed, well-timed way to design characters as state machines, and to prevent the team from having to constantly solve the same problem. In code, each character is a set of states with transitions.
One unique feature of my system is that states can be hierarchical, using polymorphism to cut down on code re-use. Many of Luke's states are not concrete actions like "punching", but encapsulations of more abstract behavior that might be needed in many sub-states. For instance, LukeHealthyState (one of the most abstract states) is responsible for transitioning to one of the LukeHurtStates when you take damage — logic that almost every normal state needs to include.
If you graphed the way states are subclassed, it'd look like a tree (see right) with the most abstract states at the top and the most concrete ones at the bottom. Crucially, because transitions are evaluated from the top of the tree to the bottom, the most generic concerns (did we take damage the last frame?) take precedence over the more specific ones in an intuitive way.
The other members of the team used this same system to implement their own characters and enemies — a football ram, an exploding frog, an alien saucer, a flamingo, and even the cars that drive around the island.
You can check out the core character classes, an example implementation, and Boyd's code in the ToBI sample repository.
SHADERS & VFX
ToBI was filled with opportunities for creative shader work. At the intersection of math and art design, VFX is one of my favorite areas of game development, and I've broken down how I made some of the most fun effects in the project below.
Explosions
What kind of 3D platformer would ToBI be without red, beeping crates that blow you up? This explosion prefab consists of three particle systems, a shader, and a realtime light working together.
The main body of the effect is a burst of sphere-mesh particles, which are quickly emitted from the explosion center and then drift upwards. These particles have a shader that rolls some Worley noise up their mesh, displacing their vertices and emitting HDR colors from a gradient sample. The shader also reads from the particles' vertex alpha to make them slowly "cool off" and vanish over time.
The explosion is sweetened with two other particle systems: some bouncy trails and floating stars that get emitted from the center.
For some added fun, Luke's shader also has a "soot damage" float uniform, which gets cranked up when he gets hit by an explosion. Toasty!
ToBI's art direction is a sun-drenched, graffitipunk take on the Memphis style — a mashup of Sunset Overdrive, Miami's Art Deco district, and 90s Nickelodeon bumpers.
The operating word for the interface was "fluid." When UI elements appear and disappear, they splatter onto the screen and evaporate off of it, powered by a shader I wrote that scrolls a Memphis-inspired grunge pattern within various graffiti alphas.
Strangely enough, my favorite VFX work I did in the game was for the pause & loading screens, where confetti particles gently drift through an implied fluid. On the pause screen, I used the stencil buffer to punch the particles' silhouettes through the central ribbon. The background is diagonally wiped in and out with an alpha cutoff.
Zap
One fun effect that ended up going unused was an implementation of the quintessential "x-ray skeleton" for getting electrocuted, which was inspired by similar effects from other cartoony platformers.
I modeled Luke's skeleton (to... an extent), made it flicker neon blue with a custom shader, and wrote another for his body that flips the culling and applies a matcap-style glow. A particle system draws a randomized ribbon of electricity arcing over him.
This effect is actually still 100% functional in the final build — Luke's skeleton is always there, lurking — but none of the enemies or hazards in the game ended up using the electric damage type, so it's impossible to trigger. Game development!
Water
Water is usually the most complicated bit of tech art in every game I make, and this time was no different. The water in ToBI consists of a surface shader, a simulation shader, six textures, and a single water material that brings all of them together.
Making things even more complicated, the open-world design of the game requires the water material to look convincing and non-repetitive at very different scales — both when the camera is practically on top of it, and when viewing it from a rooftop several kilometers away.
Let's go through the solution step by step!
Modeling
First off, we need something to apply the water material to. The ocean in ToBI is the boundary of the playspace, and was specifically modeled to line up with the various beaches and outcrops of Beryl Isle. While this was manual work, it ended up being necessary for performance reasons (I didn't want an expensive water plane being rendered underneath everything in the city) and also gave me fine-grained control over the poly density.
Of course, you can also slap the same water material on a procedural polygon, which was useful for making swimming pools, fountains, aqueducts, and whatever else.
Coloration
The water surface shader does a lot, but the very first part of the look is its coloration gradient. Using GrabPass, the surface shader nabs the prior contents of the screen, figures out how close each pixel is to the water surface with a depth buffer comparison, and then recolors each pixel with a gradient sample. The shader also lets you configure how deep the gradient penetrates into the water (see right.)
To get a richer, more consistent palette, everything underwater is turned grayscale before being multiplied with its new water color.
If the water is extremely shallow, some bright white "foam" is also brought into the albedo, which makes for a nice edge highlight.
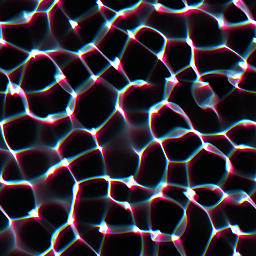
Caustics
The next part of the surface shader is a shimmering layer of caustics, which adds a lot to the appeal. Though the caustics look like they're being drawn onto the submerged geometry, they're actually on the surface of the water.
Using some wacky projection math, we can reconstruct world space from the depth buffer, figure out where the submerged geometry is, and use its position to project some UV coordinates from the sun.
The caustics (which are just two copies of that texture scrolling past each other) are then added to the emission of the water surface.
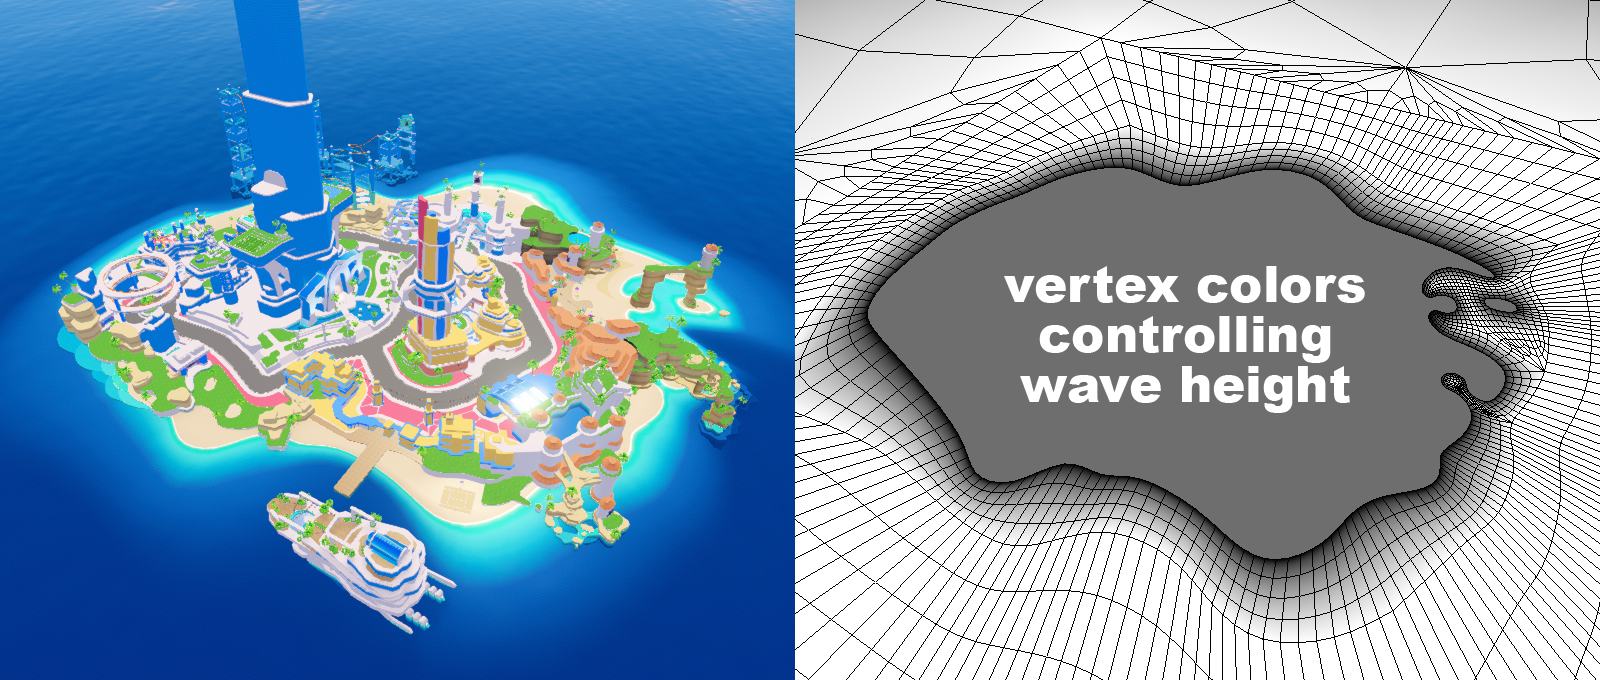
Simulation & Tesselation
ToBI's water is also a dynamic local simulation — when Luke moves or swims around in any body of water, he realistically displaces its surface.
This is where that simulation shader comes in. At all times, a 256x256 texture is sitting in memory as the "water simulation buffer", with its red channel representing surface displacement and its green channel representing surface velocity (see in-game comparison at right.)
When Luke moves around, a script tells the simulation shader to write some negative velocity at his current position (the texture is mapped in world space.) The shader then runs the "simulation tick", where a little bit of ambient velocity is applied from a scrolling texture, and all velocities get propagated to adjacent pixels using Hooke's law.
Finally, the surface shader reads from that buffer to displace its vertices, adjust its normals, and refract what it's pulling from the GrabPass. It also uses Unity's edge-length tesselation to get a respectable poly density for close-up viewing.
As far as I can tell, this is the same general technique used to simulate all of the fluid and local fog in Super Mario Odyssey.
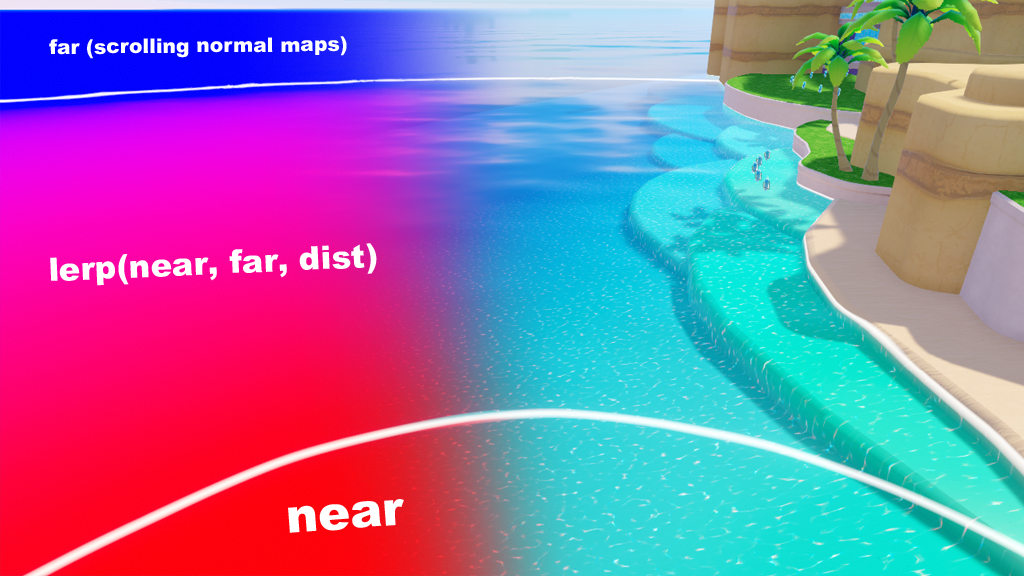
Level of Detail
Obviously, nobody has the VRAM to simulate an entire ocean like that, so this is where LOD tricks come into play. After a certain distance, the detailed displacement-and-velocity "near simulation" starts to fade into a much simpler "far simulation", which is basically just the classic "scroll some normal maps over each other" trick for making cheap water. This is the version of the water you're looking at from the tops of buildings.
This also ended up being one of those situations where putting an execution branch in a shader was worth it. Computing the normals for the near simulation is extremely expensive per-pixel, and having the surface shader completely bypass those lines upon reaching the far LOD made it much more performant, given how much distant ocean is usually on-screen.
While overall I'm really happy with how the water in ToBI turned out, in future games I'd like to focus more on doing surface foam and impact particles to really sell the water interacting with objects.
You can check out the assets and shaders that go into the effect in the ToBI sample repository.
CLOSING THOUGHTS
I learned a ton from leading this project for a year, and got to deepen my knowledge in disciplines all over game development — from editor tools to character animation to shader wizardry. I hope this peek behind the curtain was enlightening.
Since I didn't make this game alone, I wanted to give a shout-out here to all my friends in VGDev who helped build Beryl Isle and populate it with fun characters. This game was a tremendous labor of love from everyone involved.
And again — if you have any questions about an aspect of the game's development I didn't cover here, or are interested in the kind of work that I do, my inbox is always open.